Enjoy 10% Off Site Wide
Enjoy 10% Off Site Wide

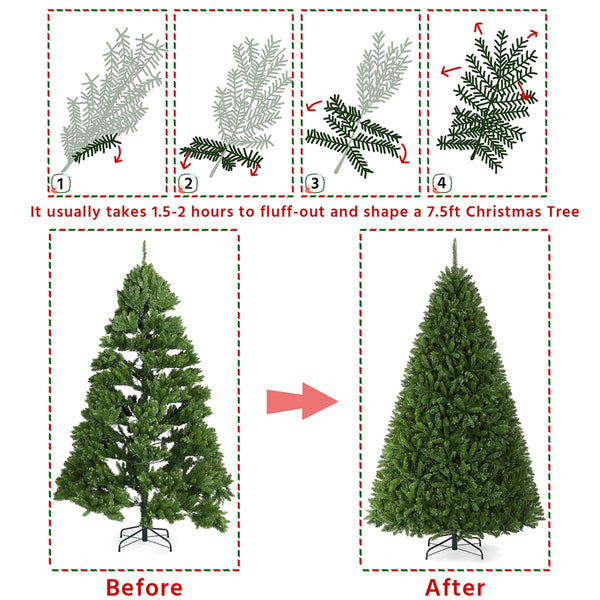
PVC Christmas tree has become the most common type of home-use Christmas tree because they are cost-effective and eco-friendly, also because of the high durability and convenience to use and maintain a PVC Christmas Tree. Many householders have turned to artificial Christmas tree for all these good features. However, setting it up can be problematic for beginners. Wrong way of setting and organizing the tips may not contribute to a realistic look that is full and fluffy. Here are some tips that might help you throughout the PVC Christmas tree shaping process.
Step 1 | Fan out the Tips
At the back of the branch, move each tip straight up or to the side so that these inner tips resemble a peacock’s fanned tail. Make sure each tip is offset from the one before it to hide the tree trunk.
Step 2 | Pull out Side Branches
As you move toward the front of the branch, separate the sprigs that shoot off from the main stem. Note that not all branches have these side branches.
Step 3 | Spread the Tips
Continue spreading each tip until the layers of foliage look like those on a real tree, until there is less caps between tips on a particular branch.
Step 4 | Shape by Layer
Starting at the bottom of the tree, work your way up by layers and sections to ensure every branch has been shaped.
Step 5 | Shape the Top Section
For 7’ trees or taller, shape the top section before placing it on the tree to avoid having to fluff while standing on a ladder.
Step 6 | Check your Work
Step back from time to time to see what parts of the tree may need more shaping, and to make sure the lights on a pre-lit tree are dispersed to your liking.
The whole fluffing process can be a bit scratchy sometimes, this is why we recommend you to wear protective gloves while setting. On the other hand, do not always make the tips in order with certain direction, it would be better to stand out and check the overall look after shaping every 2-3 branches and adjust accordingly.
Leave a comment